 |
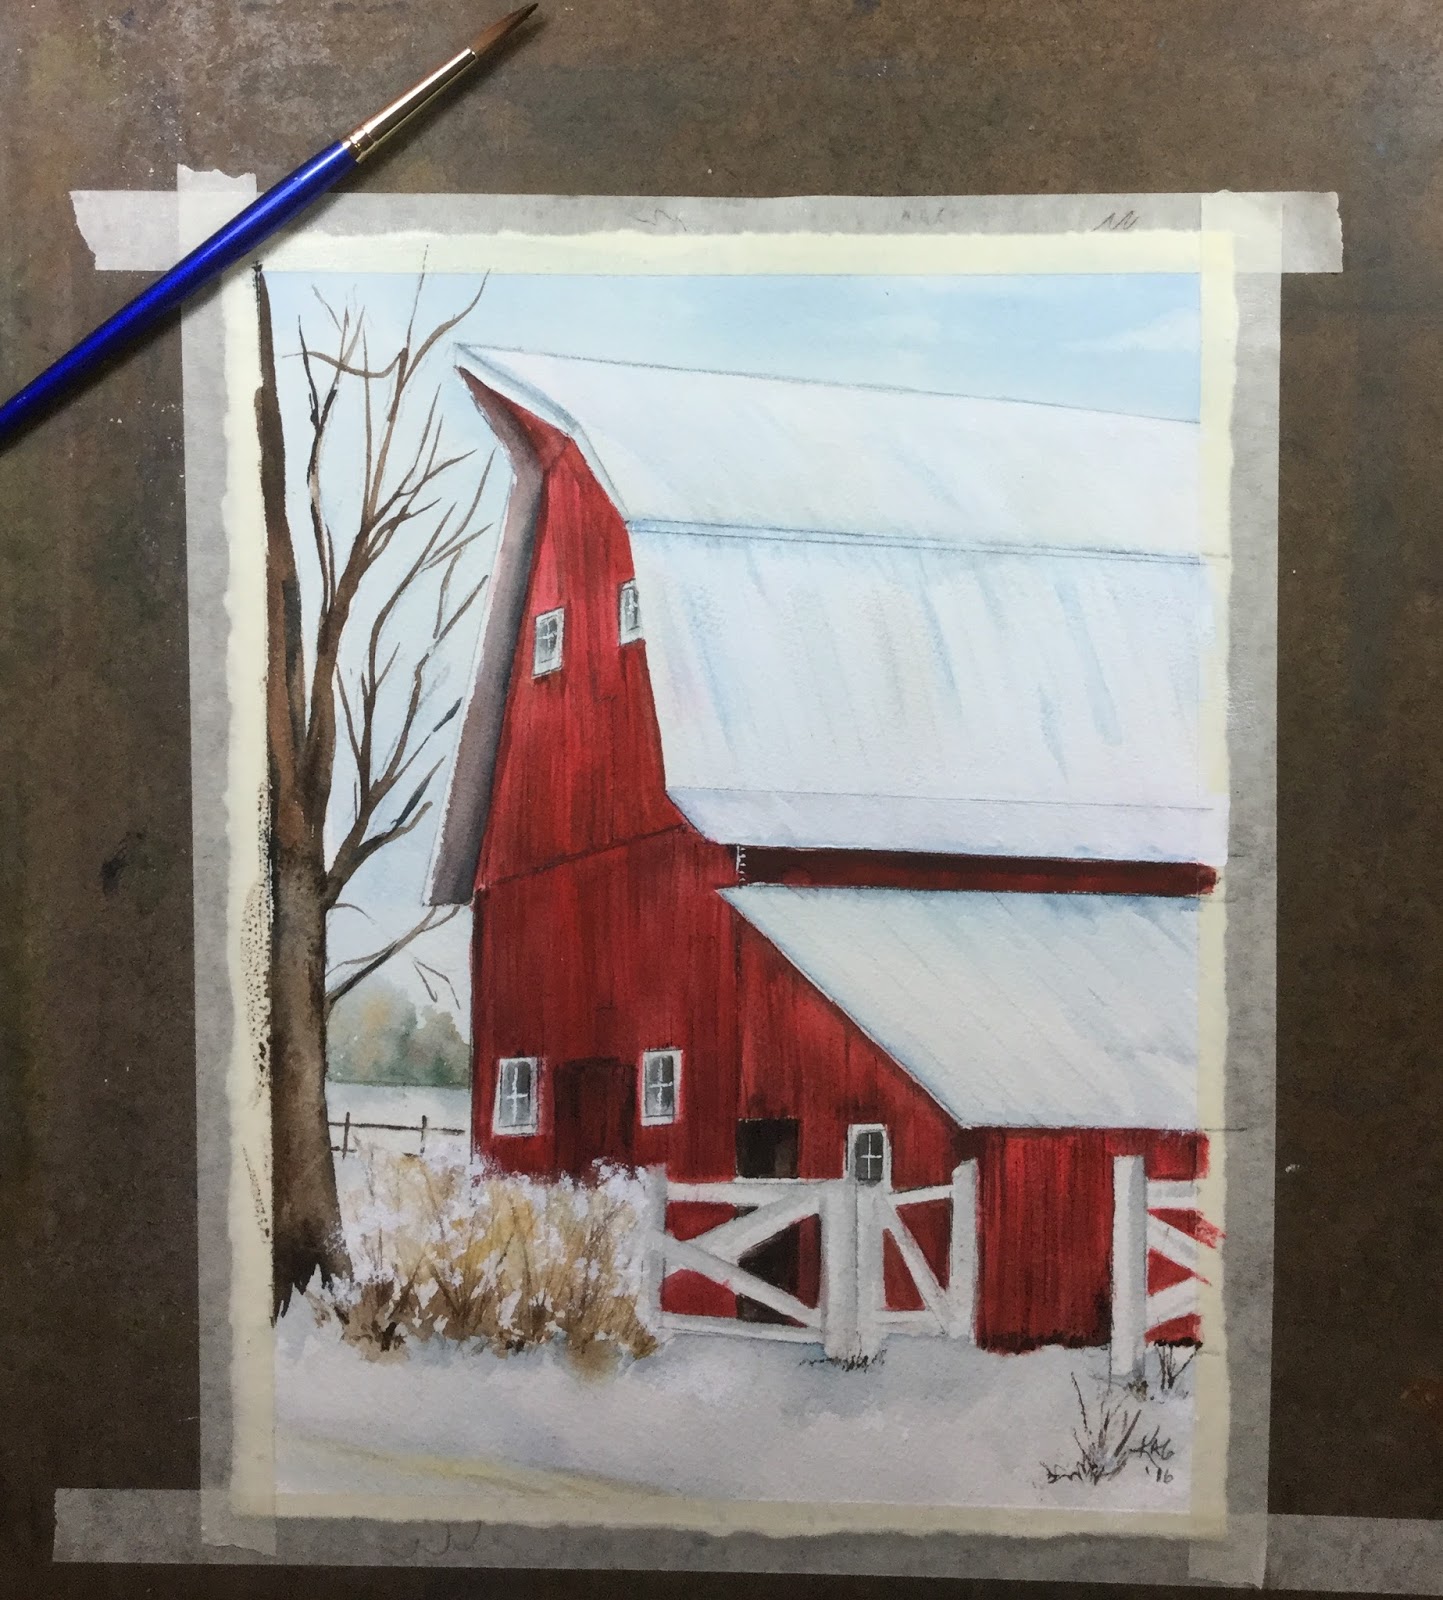
| Red Barn on a Winter Morn 9" x 12" Watercolor by Karen A. Cooke |
Red
Barn on a Winter Morn
I love painting barns and there was just
something special about this one that stood out and begged to be painted. I
think the contrast with the white snow and the light blue sky makes this winter
scene a cheerful one.
The most difficult part of this painting is
the perspective. With the many roof
angles, getting the perspective correct is one of the most important components
of your painting.
How comfortable are you with your drawing
skills? If you feel as though you may
require using an eraser multiple times to get the perspective correct, then I
would suggest drawing the barn on a piece of sketch paper cut to the same size
as the watercolor paper. Multiple erasures and lines can damage
watercolor paper and when paint is applied, it will pool in any indentations on
the paper. Multiple erasures may also
“rough up” the paper which will show in the finished painting.
Materials required:
Watercolor paper, size of your choice. I
used 9” x 12” paper.
Sketch paper, same size of your watercolor
paper, if needed
Masking fluid and old brush
Paint brushes: flat brush, round brush
and liner brush for details
Paint:
-
Payne’s Gray
- Cerulean Blue
- Cobalt Blue
- Burnt Umber
- VanDyke Brown
- Yellow Ochre
- Sap Green
- Crimson
Masking fluid and old brush
Painting Instructions:
How to transfer a sketch:
Lightly sketch in the windows and doors. Drawn the fence and lightly sketch the shape of the tree. Do not draw individual limbs; these will be painted in. Sketch in the horizon.
Drawn the barn on the watercolor paper or your sketch paper.
Do not prepare a detailed drawing; simply get the perspective correct
and placement on your paper. If you
prepared a sketch first, transfer your sketch to the watercolor paper.
How to transfer a sketch:
2 methods:
1.
Graphite transfer paper: Place a piece of transfer paper between the
drawing and the blank watercolor paper.
Lightly trace along the lines of your drawing. Do not press hard enough to leave
indentations in the watercolor paper.
2.
The sketch: Turn the sketch over and rub the back of the
drawing with a pencil leaving dark pencil spaces along the lines of the
drawing. When all of the lines have been
covered with heavy pencil marks, place the sketch on top of the watercolor
paper with the pencil marks facing the watercolor paper. (You have made your
own graphite paper.) Lightly trace
along the lines of your drawing on the front side of your sketch. Do not press hard enough to leave
indentations in the watercolor paper.
Lightly sketch in the windows and doors. Drawn the fence and lightly sketch the shape of the tree. Do not draw individual limbs; these will be painted in. Sketch in the horizon.
In order to retain the white trim around the windows, doors and the fence, use
the masking fluid and an old brush, apply the masking fluid and allow to dry.
Painting the Sky and Background Trees:
Prepare a light wash of Cerulean Blue for the
sky. Working around the barn, wet the
area down to the horizon. The light sky
color can be painted in the area where the tree will be painted in another
step. Apply the sky color using a flat
brush. Using a tissue remove some of
the paint for cloud shapes. Before the
sky dries, drop in the trees at the horizon using VanDyke Brown and Sap Green. Let the colors diffuse. Allow
to dry.
Painting the Barn:
I painted the sides of the barn first;
however, the roof can be painted first if you prefer. Prepare a wash of Crimson with a small amount
of VanDyke Brown and/or Brunt Umber to deepen the red. Addition brown will be added for shadows as
shown in the photo above. When the
primary color of the barn has dried, use a dry, flat brush with the bristles
spread, and paint the wood grain and board lines of the barn with a deep shade of Crimson and
VanDyke Brown. Paint any broken areas
of the wood with this same color (see bottom edge of right side of the
barn).
Using VanDyke Brown and Paynes’s Gray, paint the open door showing the shadows inside
the barn.
Prepare a wash of Payne’s Gray for the inside
of the windows. This is where using the
masking fluid definitely makes life easier!
Allow to dry and remove the
masking fluid. Add a light wash of Payne's Gray in various locations on the white window time for detail and shadows.
Referring to the photo of the painting, paint
the roof using a mix of Cerulean Blue along with a light wash of Payne’s
Gray. Either a flat brush or a round
brush can be used. Deepen the paint
around the edge of the room and at the roof angles. Using a wash of Payne’s Gray, paint the
underside of the roof on the left side of the barn. Allow
to dry.
Painting the Fence:
Remove the masking fluid. Although the fence is white, adding shadows
to the fence will give it a more realistic look. Refer to the photo above to see where to
apply the gray paint. Allow to dry.
Painting the tree:
Using a wash of VanDyke Brown and Burnt Umber,
paint the trunk of the tree. Wet the
tree trunk before painting and deepen the color in places. This is not detailed. Using the same color paint and a round brush,
paint in the branches tapering from
large to small. Use a liner brush to
pull in the smallest branches.
Painting the Snow:
Wet the snow and using a pale wash of Payne’s
Gray, drop in the shadows. Deepen
the snow under the fence and around the posts.
Be certain to paint the shadows in the background at the tree line. Allow this to dry.
Painting in the Grasses at the Fence:
Wet the area with clean water. While still wet, drop in Brunt Umber and
Yellow Ochre at the base of the plants and using the small piece of credit
card, pull the paint up into the shape of the grasses. Allow to dry.
Add a few springs of grass at
the bottom of fence post with a liner brush.
Painting the background fence:
Using the same paint as the tree, paint in the
fence rails using a liner brush.
Paint the road:
Using a pale wash of yellow ochre and Payne’s
Gray, paint in the road. Paint darker
areas to indicate tire tracks.
Review your painting for any details you would
like to add. Allow to dry and sign your
painting!
Happy Painting!
Karen


No comments:
Post a Comment